Handheld techniques: Harries (stable, distance), FBI/neck index (fast, close), Rogers (max control).
Light splashing: Bounce off ceilings and walls — illuminate without broadcasting position.
Strobe: Controversial — works at distance, can disorient you indoors. Train realistically.
Bottom line: Technique over lumens. Master the fundamentals first.
✔ Experienced users refining light discipline
✔ Home defenders and concealed carry holders
✔ Law enforcement and security personnel

1. Light Discipline — When to Activate, When to Kill It
Light discipline is the most critical skill in low-light shooting. A light reveals your position, silhouettes you, and broadcasts your movement. Every activation must be intentional and brief.
A structured protocol governing every activation of an illumination tool in a tactical context. It ordains momentary-on for searching and scanning, constant-on only after positive threat identification, and immediate deactivation after engagement or movement. Proper discipline makes the operator unpredictable; poor discipline turns the light into a beacon that adversaries track back to its source within seconds.
- Momentary activation: Press and release. Use for searching, scanning, and identifying potential threats. Keeps you mobile.
- Constant activation: Only after positive threat ID and the decision to engage. Minimize exposure time.
- Never activate before presenting the firearm. The light comes on as the weapon reaches your line of sight.
- Kill the light after engagement. Fire, deactivate, move laterally, then reassess. Predictable positions get punished.
Force-on-force research consistently demonstrates that shooters who leave lights on continuously are engaged and hit by opponents who track the beam back to its origin within 2–3 seconds. The trained shooter activates only for the duration of target identification and engagement — typically under one second per activation.
2. Handheld Flashlight Techniques

Every shooter should master handheld techniques — your weapon light can fail, and you may need to search without pointing a firearm at unidentified subjects.
The Harries technique was developed by firearms instructor Michael Harries. It works by pressing the backs of both hands together, creating isometric tension that locks your wrists. The light is held in your support hand, thumb on the tail switch, while your strong hand grips the weapon. Your support-hand index finger can wrap around the strong-hand wrist for extra stability.
When to use it: Distance shots beyond 10 yards, or when you need a precise sight picture in low light. The tradeoff: your support hand cannot help manage recoil, and drawing from a holster takes an extra beat. Practice transitioning from FBI neck index (fast scanning) to Harries when you decide to engage a distant target.
- Harries technique: Most stable for distance shots. Tradeoff: slows presentation.
- FBI / Neck index: Light held at neck level, arms relaxed. Fastest to deploy. Best for close-quarters searching and rapid transitions.
- Rogers / SureFire technique: Light held between ring and pinky fingers, support hand wraps around. Maximum control — requires significant practice to achieve automaticity.
FBI/neck index deploys fastest but sacrifices precision beyond 7 yards. Harries adds stability through isometric wrist tension but costs time during draw-to-presentation. Rogers maximizes both grip and light control but requires the highest training investment. Select based on your operational context, not a single "best" technique.
3. Weapon Light Only — The Fastest Defensive Option
A quality WML keeps both hands on the weapon and enables activation during presentation: grip → clear holster → present → activate light at eye level → identify → engage or deactivate.
- Train until automatic: Dry-fire the activation timing 50+ times per session until it requires zero conscious thought.
- Momentary only: Most WML switches support momentary-on — use it. Constant-on is for confirmed engagement only.
- Dual-tool approach: WML on the defensive firearm, plus a handheld light for administrative searching. The handheld lets you illuminate without muzzling.
4. Light Splashing — Indirect Illumination

Direct beam illumination announces your position. Light splashing — bouncing the beam off ceilings, walls, or the ground — illuminates areas indirectly while keeping your light source position ambiguous.
- Ceiling bounce: Shine upward in rooms with light-colored ceilings. The entire space fills with diffuse light, revealing movement without broadcasting your exact position.
- Wall splash: Aim at a wall adjacent to the area you want to illuminate. Effective in hallways and multi-entry rooms.
- Ground bounce: Outdoors, direct light at the ground ahead to illuminate your path without signaling across open terrain.
Indirect illumination exploits the inverse-square law in the operator's favor. A 1000-lumen beam bounced off a standard white ceiling delivers approximately 15–25 lux across a 12×12-foot room — sufficient for threat identification — while the light source origin point becomes impossible to pinpoint from the illuminated area.
5. Strobe — Tool or Gimmick? The Real Debate

Strobe modes divide opinion. Proponents cite threat disorientation; critics note that backscatter in small, light-colored rooms can degrade the operator's vision as much as the target's.
Strobe effects are not universally endorsed by professional trainers. Instructors like Craig Douglas (ShivWorks ECQC) argue that in close quarters (inside 5 yards), a bright strobe can disorient the user as much as the threat — especially in small rooms with white walls. Backscatter can degrade your own vision, and the rapid flicker may slow your cognitive processing of the threat's actions.
When it works: At distances beyond 10 yards, when you want to create separation from an advancing threat, or as an attention-grabbing signal. When it fails: In reflective environments, under extreme stress without dedicated training, or if your thumb has to hunt for a separate button. Train with strobe on a dark range with a partner — have them attack a heavy bag while you activate strobe. You'll quickly see if it helps or hinders you.
- Effective for: Creating distance, disorienting an approaching threat, emergency signaling.
- Problematic when: Operator is in a small reflective room (backscatter affects both parties), threat is at distance (strobe effect diminishes with range), or user lacks extensive practice.
- Practical verdict: Strobe is a supplemental tool — not a primary tactic. If you cannot activate it reliably under stress, or it impairs your own vision, disable it until proficiency is achieved through dedicated training.
6. Avoiding Tunnel Vision
High-output lights induce tunnel vision — the operator fixates on the illuminated cone while ignoring everything outside it. This is a documented physiological response that must be actively countered.
- Sweep scanning: Move the light continuously. Never fixate on one spot for more than two seconds.
- Light splashing: Use indirect illumination to reduce the contrast between lit and dark zones.
- Auditory awareness: When vision collapses into the beam cone, rely on hearing for peripheral threat detection.
- Partner tactics: One operator illuminates, the other covers dark areas — eliminating the tunnel entirely.
Step-by-Step: Low-Light Training Progression
- Step 1 — Light Discipline: Dry-fire practice. From low ready, activate light only as weapon reaches eye level. Identify target on wall, press trigger, immediately kill light, move laterally. 20 repetitions per session until automatic.
- Step 2 — Handheld Techniques: Dry-fire Harries, FBI, and Rogers separately. Focus on transitioning from searching (light on, no firearm) to engagement (firearm presented, light integrated).
- Step 3 — Light Splashing: In a darkened room, practice ceiling bounces and wall splashes. Enter doorways using indirect light first, scanning the room before direct beam engagement.
- Step 4 — Live-Fire Drills: On a low-light approved range, begin in low ready with light off. On command, activate, engage with 2 rounds, kill light, move, repeat. Run monthly — low-light skills degrade faster than daytime marksmanship.
7. Training Drills — Dry Fire to Live Fire
- "5-Second Rule" (Dry Fire): From low ready, activate light, identify target, trigger press, kill light, move. 20x per session.
- "Light On/Off" (Live Fire): Low ready, light off. On command, activate, engage (2 rounds), kill light, new position, repeat. Range must permit low-light shooting.
- "Decision Drill" (Dry/Live): Multiple targets in a darkened room — some marked as threats, some blank. Use momentary activation to identify and decide to engage or bypass.
8. Subtle Details That Separate Range Practice from Real-World Low Light
- Ceiling color matters: A white ceiling bounces light beautifully. A dark wooden or textured ceiling eats it — leaving you with only direct beam. Test your home's ceiling before assuming light splash works everywhere.
- Light splash creates a shadow zone: If you bounce off a wall to your left, your right side remains in darkness. A partner covering that shadow eliminates the blind spot.
- Never shine a light directly into a mirror or glass surface: The reflection back will blind you. Instead, bounce off an adjacent wall or aim at the floor in front of the mirror.
- When moving after killing the light, don't just step sideways — change elevation: Crouch, then stand, or step wide to break the silhouette the threat's eyes have locked onto.
📥 Free Download: Low-Light Shooting Quick Reference Card (PDF)
One-page printable: techniques summary, light discipline rules, and training drill checklist. Range-bag ready.
❓ Frequently Asked Questions
Is strobe effective for home defense?
Mixed results. In small, light-colored rooms, strobe backscatter can impair the operator as much as the threat. If you train extensively with strobe and can activate it without conscious thought under stress, it can be effective for creating distance. If not, rely on momentary or constant-on.
Should I use a weapon light or handheld for home defense?
A WML is faster and keeps both hands on the firearm. However, a handheld allows searching without pointing a firearm at unidentified subjects — critical when family members may be present. Best practice: WML on the defensive firearm plus a handheld for administrative searching.
How many lumens for indoor low-light shooting?
500–1000 lumens is the practical indoor range. Outputs above 1500 lumens create significant backscatter off white walls, temporarily degrading the operator's vision. Outdoors, higher lumens (>1500) provide advantage for distance identification without the backscatter penalty.
Do I still need to train low-light if I have a bright flashlight?
Yes — absolutely. A bright light does not replace technique. Without regular training, shooters activate at the wrong moment, flag unintended targets, or freeze because activation timing is not automatic. Low-light skills are perishable and must be maintained monthly.
What low-light technique should beginners learn first?
Start with FBI/neck index — fastest to learn and deploy, keeps the light near centerline for natural alignment. Master momentary activation timing during dry fire before progressing to Harries for distance shots. Add WML training only after handheld fundamentals are solid.
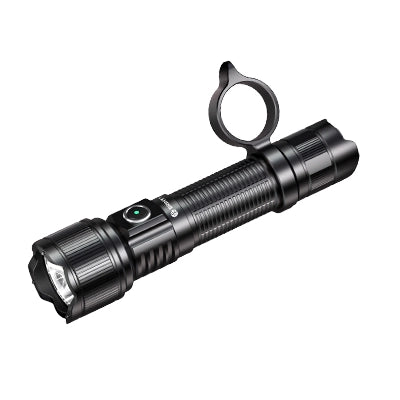
The tactics above require lights with three features: momentary-only activation (no mode-cycle delay), dedicated strobe switch (if you choose to use it), and ergonomic placement for gloved or stressed hands. Brinyte's PT16A uses dual tail switches: one for momentary/constant turbo, a separate for instant strobe — no clicking through modes. The XP22 MK3's independent light/laser paddles let you activate each function without toggling. These are engineering choices that support the discipline described here.
Equip Your Low-Light Training Setup
Explore Brinyte tactical flashlights and weapon lights — engineered for the techniques and drills in this guide.
Shop Tactical LightsAbout Brinyte
Founded in 2009 — 50+ patents, ISO9001 certified. Brinyte builds tactical lights for shooters who train in the dark and refuse to let their gear be the reason a technique fails. All products tested to ANSI/NEMA FL1 standards. Tactical claims based on published low-light shooting doctrine and professional training community research.
"Engineered for the mission — proven in the field."
Founded 2009 · 50+ Patents · ISO9001
• Low-Light Force-on-Force Research — Professional Tactical Training Community
• Brinyte PT16A Product Specifications & ANSI/PLATO FL1-2019 Test Data
• Handheld Flashlight Technique Comparison — Law Enforcement Low-Light Training Doctrine